


Q1. What to do if the AD5X nozzle is clogged?
Troubleshooting Step1: Manually press the handle at the extruder, cut off the filament, then remove the guide tube and check if the filament tip is flat. If not, trim it to be flat, reinsert the guide tube and filament into the extruder, and then click for loading to check.
Troubleshooting Step2: Remove the extruder and check if the filament is blocked inside it.
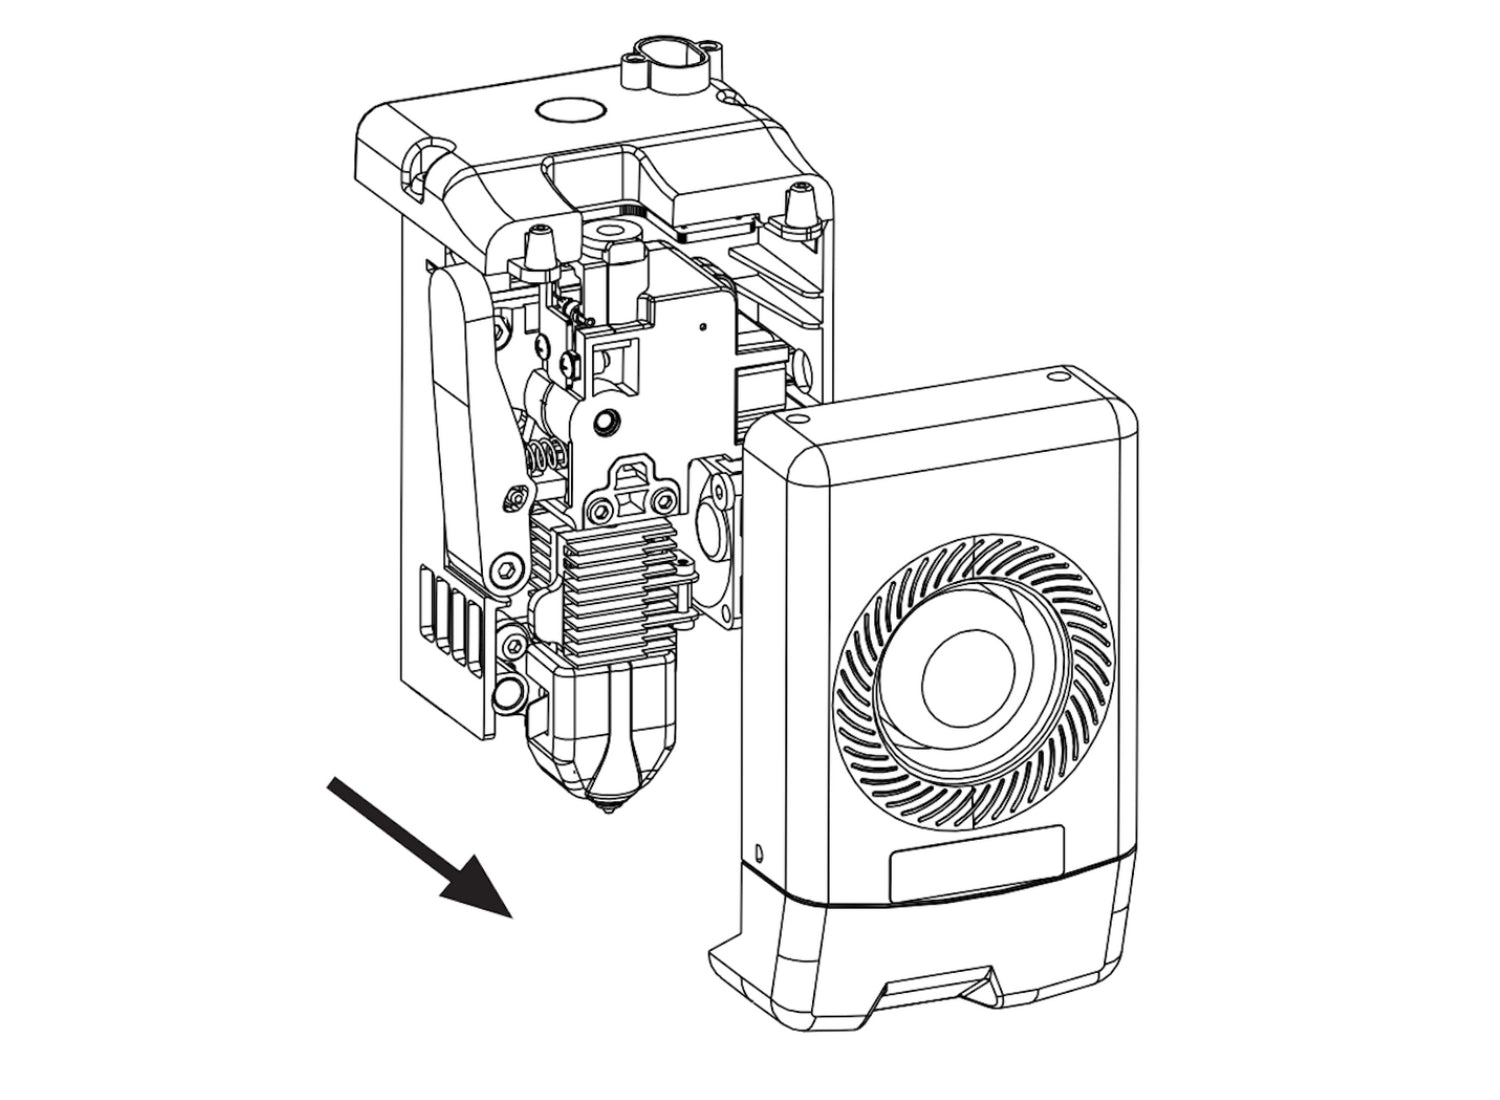
Q2. How to replace the nozzle of AD5X?
If there's filament inside the nozzle, please unload it first or manually cut it off.
Then follow these steps:


When reinstalling the nozzle, ensure it is properly aligned and securely fastened. Install the
silicone sleeve back into place. After replacing the nozzle, it's crucial to perform a nozzle
temperature calibration and bed leveling.
Q3. Is leveling/calibration required after replacing the nozzle?
Yes. It is recommended to perform automatic leveling to ensure high print quality as slight errors
may occur during nozzle installation. The device will have leveling enabled by default before each
print. A temperature calibration for the new nozzle is also required.
Q4.What to do if the extruder moves but no filament comes out at the beginning of printing after starting the print?
1. Observe the filament guide tube to check if filament has entered the nozzle. If not, please click
the loading button until filament comes out.
2. Check if the nozzle is clogged. If so, please refer to the solution of Q1.
Q5. What to do if the nozzle position is too high (far from the bed) or too low (hitting the bed) during printing? How to adjust it?
Please check if the bed is properly installed and there is no excessive residue on the nozzle. If these issues exist, address them first. Then, go to the settings interface, select the leveling option, and perform automatic leveling or enable automatic leveling before printing. If the problem persists and your entire print is coming out poorly because the nozzle is too close or too far from the bed, you can adjust the Z-axis offset by clicking functional button on the screen. If the bed is too far, click the up arrow. If the bed is too close, click the down arrow.

Q6. Can filaments from other brands be used?
Yes. You can use filaments from other brands, like eSun, Bambu Lab, Creality, Elegoo, but certain parameter adjustments are required due to slight temperature differences in different filaments.
Q7. What to do if your print is warping or not adhering well?
Solution 1: Increase the bed temperature to improve adhesion between the bed and your print.
Solution 2: Add a brim when slicing your model.
Solution 3: Apply glue.
Solution 4: Clean the bed to remove any grease or residue.
Solution 5: Check if the bed is level. The leveling and calibration function can be used.
Q8. What to do if print files can not be found and the screen displays only folders after inserting the USB flash drive?
The USB flash drive format may be incorrect. The device supports the FAT32 file
system. Please format the USB flash drive to FAT32.
Q9. What to do with the Wi-Fi connection failure?
1. Please check if the Wi-Fi name contains special characters. If so, modify it and try again.
2. Please check if the password contains special characters. If so, modify it and try again.
Q10. What to keep in mind during a firmware update?
Do not power off the printer or disconnect from the network during firmware download or
update to prevent update failures.
Q11. Why is the screen blank on startup?
If the startup sound can be heard, please replace the screen or the cable. If not, please contact customer support <customer@flashforge.com>.