


Introduction: The Challenge of Batch 3D Printing
In today's fast-paced 3D printing environment, efficiency is paramount. Many makers and professionals frequently print multiple models simultaneously to maximize productivity. However, this common practice comes with significant risks - when one model fails due to adhesion issues, layer shifting, or other common 3D printing problems, it often jeopardizes the entire print job. Traditional solutions force users to make a difficult choice: either waste time and filament by restarting the entire batch or risk continuing with potentially catastrophic results.
This is where Flashforge's innovative Exclude Objects feature for the Adventurer 5M series revolutionizes the multi-model printing workflow. By implementing this smart solution, users can now isolate and skip failed models while allowing successful prints to complete uninterrupted - a game-changing advancement in 3D printing reliability.
As shown below, without the Exclude objects feature enabled, layer shifting in one model caused the entire print job to fail.

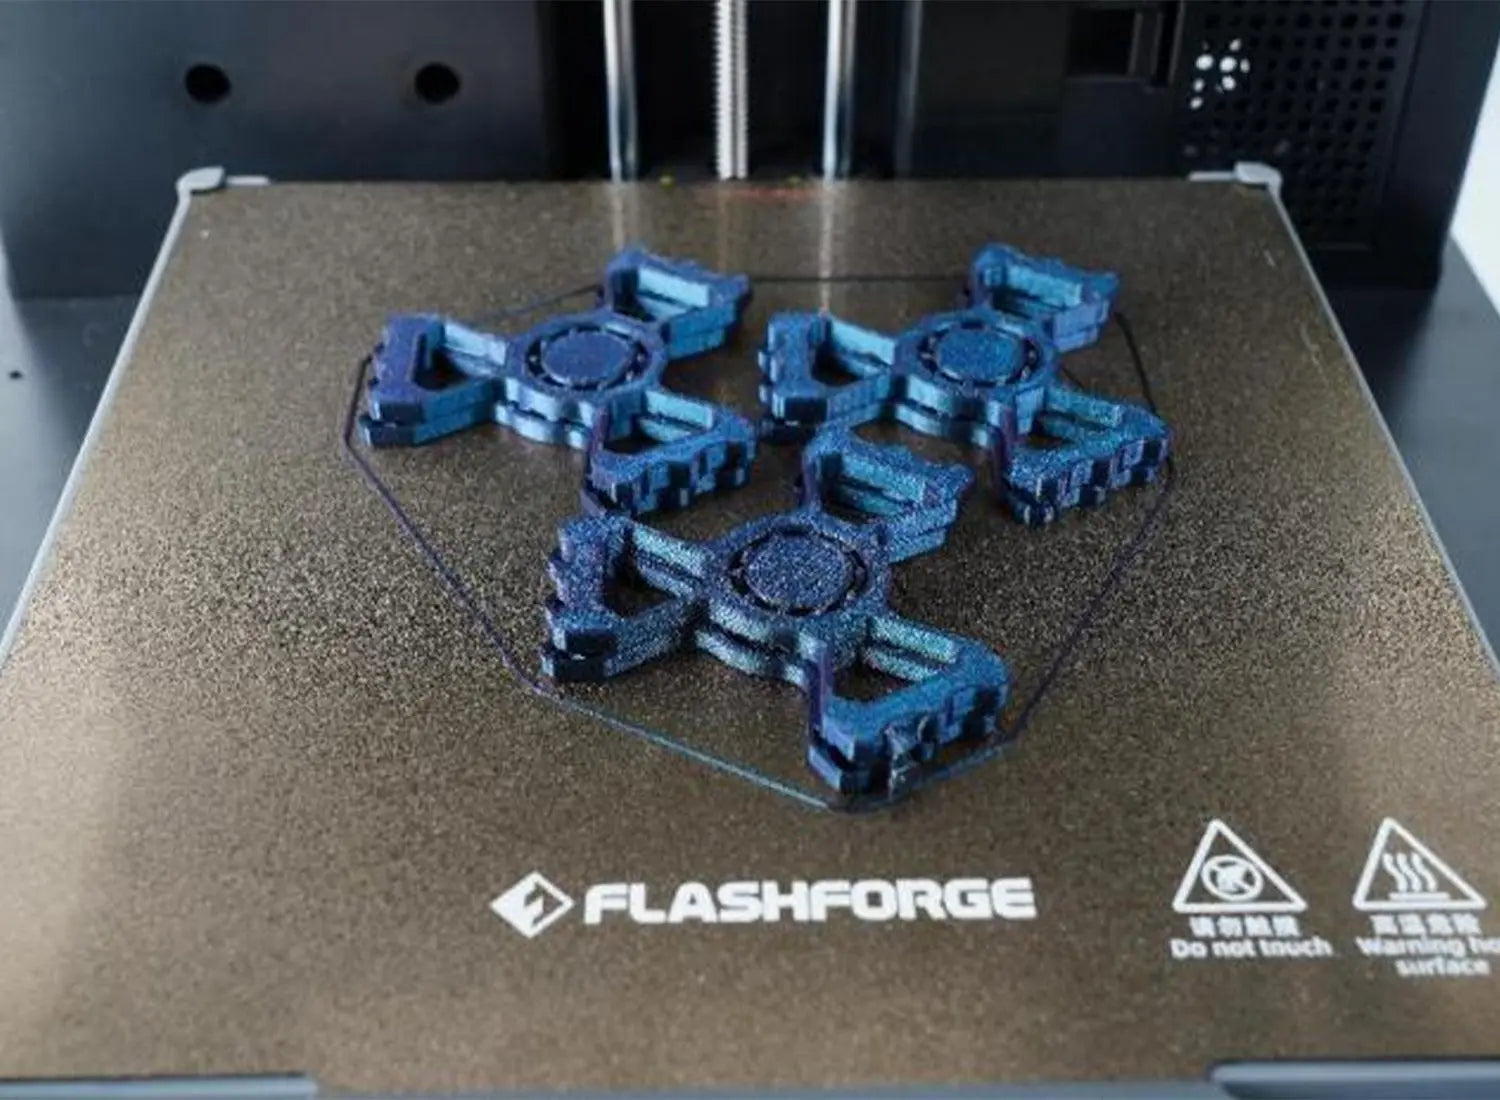
However, with the Exclude objects feature enabled, the printer will automatically skip the failed model and only print the other two.

(Print results with Exclude objects enabled)
If you need to print multiple models, you can check the [Exclude objects] option as default slicing setting. This allows you to enable Exclude objects directly on the printer if any issues arise.
Note:
- First, upgrade your Adventurer 5M series to the latest firmware (version 2.6.5).
- Install and use OrcaSlicer 2.0 for slicing.
- Orca-Flashforge doesn't currently support this, but it's in development.
For detailed instructions, watch the video below (you can also refer to the Wiki page at https://wiki.flashforge.com/en/Orca-Flashforge-and-Flashmaker/exclude-objects
Calling all Flashforge Adventurer 5M Series owners!
Step-by-Step Guide:
- Slicing Settings
Open OrcaSlicer 2.0, import the model, enable [Advanced] in the [Process] tab, select [Others], scroll down to find [G-code output], check [Exclude objects], and then complete slicing.

- Printing Settings
Print the sliced file. After printing starts, the [Exclude objects] icon will appear on the screen. Click to enter the setup page.


Click the model to be skipped, select it, and the area will turn blue. Click the Save button to confirm. After successful saving, the selected area will turn red. During printing, the selected model will be skipped.


To choose other areas during printing, repeat the above steps. Here's the print result after enabling the Exclude objects feature:
Here's the tutorial for the Exclude objects feature. If you need to print multiple models, you can check the [Exclude objects] option as default slicing setting. This allows you to enable Exclude objects directly on the printer if any issues arise. Adventurer 5M series owners, give it a try now!
Conclusion: Transforming Your 3D Printing Workflow
As 3D printing continues to evolve, smart features like Exclude Objects are setting new standards for professional-grade reliability. Whether you're a hobbyist creating complex multi-part projects or a professional running a print farm, mastering this feature will elevate your 3D printing capabilities to new heights.